

How to prepare artwork for print: the clear checklist to get it right first time
You’ve spent hours crafting your artwork, only to face delays because the files weren’t print-ready. Getting your artwork spot-on the first time saves you from costly reprints and last-minute stress. This clear checklist on how to prepare artwork for print covers everything from CMYK colour to bleed and safe areas, ensuring your files move straight to production without a hitch. Keep reading to master print-ready artwork and make your next project seamless.
Essential Artwork Preparation Steps
You’re eager to see your artwork come to life, but first, it’s crucial to prepare it correctly. Follow these steps to ensure a smooth transition from digital files to printed materials.
Understanding Colour Modes
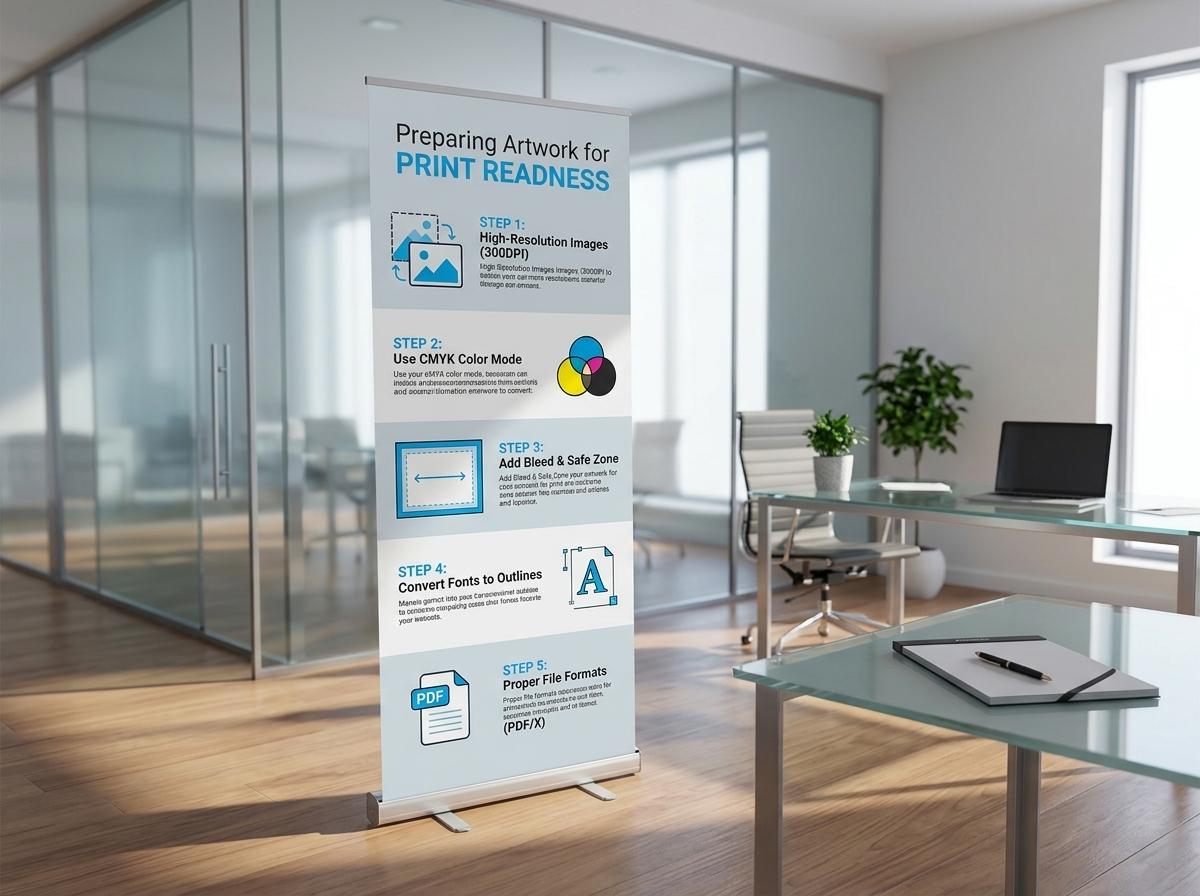
Start with colour accuracy. Use CMYK for printing. It stands for cyan, magenta, yellow, and key (black), the standard colour model for print. RGB, which stands for red, green, and blue, is meant for screens. If you don’t convert your artwork to CMYK, colours might not print as expected. To achieve vibrant hues, adjust your colours in a CMYK workspace. Testing a small print sample can prevent surprises.
Setting Up Bleed and Safe Areas
Next, focus on bleed and safe areas. Bleed is extra space added around your artwork to ensure the print extends to the edge of the paper after trimming. Typically, a 3mm bleed is standard. Safe zones are inner margins where important content should stay to avoid being cut off. Keeping text and key elements within this area ensures they remain visible.
Ensuring 300 DPI Resolution
Resolution is key for clarity. Set your artwork at 300 DPI (dots per inch) for crisp, high-quality prints. Lower resolutions may result in blurry images. Always check image and text clarity at this resolution. If you use images from the web, ensure their quality suits 300 DPI to maintain professionalism.
Key Elements for Print-Ready Files
Once the basics are set, it’s time to refine details that can make or break your print job. Attention to these elements will streamline production.
Outlining Fonts and Embedding Images
Fonts and images must be handled with care. Convert text to outlines to prevent font substitutions. This ensures your text appears as designed, even if the printer doesn’t have the font. For images, embed them in your file. This avoids missing links and keeps your layout intact.
Crafting Vector Logos and PDF/X Export
Logos should be in vector format for scalability without quality loss. Use software like Adobe Illustrator for this. When exporting your final file, choose PDF/X format. This print-ready format preserves your setup and ensures compatibility with printers, maintaining your project’s integrity.
Conducting a Thorough Preflight Check
Before sending files to print, perform a preflight check. This process identifies issues like missing fonts or images and incorrect settings. Most design software offers preflight tools. Catching errors here saves time and money by preventing reprints.
Special Considerations for Unique Prints
Certain prints need extra attention. For these projects, specific steps ensure they look professional and polished.
Using Cutter Guides and Dielines
If your project involves unique shapes, cutter guides and dielines are essential. They show where to cut and fold, especially useful for packaging designs. Make these guides clear and accurate to avoid miscuts.
Designing Folded Leaflet Artwork
Folded leaflets require precise planning. Consider how the design flows across panels. Ensure text and images align correctly when folded. Test a print on regular paper first to see how it looks when folded.
Templates for Roller and Scaffold Banners
Large format prints like banners need special templates. These templates ensure dimensions and resolution are correct for large-scale productions. Roller and scaffold banners often have specific size requirements, so using the right template avoids costly mistakes.
Frequently Asked Questions
What is the difference between RGB and CMYK?
RGB is for digital screens, while CMYK is for printing. Using CMYK ensures colours print accurately.
Why do I need a bleed in my artwork?
Bleed ensures your design extends to the paper’s edge after trimming, preventing unwanted white borders.
What is a preflight check?
A preflight check reviews your file for errors like missing fonts or links, ensuring it’s ready for print.
How can I ensure my text prints correctly?
Convert text to outlines. This prevents font substitution and keeps your design intact.
Why is 300 DPI important?
300 DPI ensures high-resolution prints. Lower DPI can result in blurry images, compromising quality.
By carefully following these guidelines, you can prepare print-ready artwork that meets high standards, ensuring professional and stunning results every time.

